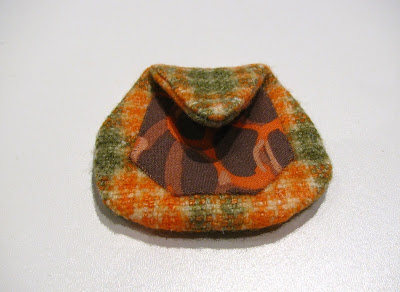
Finally, I am back in my studio, and to start the new sewing season, I worked on a very easy project perfect for fall. I don't know why it is, but owls are a symbol of fall to me, and paired with cozy wool plaids, it looked like a match made in heaven.
Enfin, je suis de retour dans mon atelier, et pour commencer ma nouvelle saison de couture, j'ai travaillé sur un petit projet facile parfait pour l'automne. Je ne sais pourquoi, mais dans ma tête, les hiboux représentent l'automne, d'autant plus s'ils sont jumelés à des beaux tissus de laine à carreaux.
The project I made is nothing new, but I thought a little tutorial might still be useful to some of you. If you do make an owl - or a whole lot of them - I would be very happy if you would send me a link to your creation in the comments.
Le projet que j'ai réalisé n'est rien de nouveau, mais j'ai pensé qu'un petit tutoriel pourrait quand même être utile à certaines d'entre vous. Et si vous vous lancez dans la confection d'un hibou - ou de toute une collection d'oiseaux - je serais très heureuse que vous ajoutiez un lien vers vos créations dans les commentaires.
Material (for one owl measuring about 3" X3")
- A scrap piece of wool (felted or not) at least 7" X 6". Other materials like velvet or denim would be great as well.
- A scrap of coordinating cotton about 3" X 3"
- The templates included at the end of this post and a small piece of cardboard.
- Two buttons about 5/8" in diameter for the eyes
- Coordinating embroidery thread
- And the usual: scissors, needle, pins, thread, sewing machine, iron (a mini iron if you have one).
Matériel (pour un hibou d'environ 8 cm X 8 cm)
- Un morceau de laine (feutrée ou non) d'au moins 18 cm X 16 cm. D'autres matières comme le velours ou le denim pourraient aussi très bien faire.
- Un morceau de coton coordonné d'environ 8 cm X 8 cm
- Le patron inclus à la fin de cet article et un bout de carton
- Deux boutons d'environ 1.5 cm de diamètre pour les yeux
- Du fil à broder agencé aux couleurs de la laine
- Et l'habituel: ciseaux, aiguille, épingles, fil à coudre, machine à coudre, fer à repasser (un mini fer si vous en avez un).
Step 1
Print the template on a letter size (8 1/2" X 11") paper sheet. The measurement I noted inside the egg-shaped piece are only there so you can check that your printed template is the same size as mine.
Cut out both pieces.
The biggest piece will be the body of your owl.
The smaller piece will be the belly, and it will be easier to use if you trace it on cardboard because paper is not sturdy enough to work well.
Étape 1
Imprimer le patron sur une feuille de papier de format lettre. Les mesures que j'ai notées à l'intérieur de la pièce qui ressemble à un oeuf sont seulement à titre indicatif, pour que vous puissiez vérifier que votre patron est de la même grandeur que celui que j'ai utilisé.
Découper les deux morceaux.
Le plus grand morceau, en forme d'oeuf, formera le corps du hibou.
Le plus petit morcerau servira de plastron, et il sera plus facile à utiliser si on le retrace sur un morceau de carton, parce que le papier n'est pas suffisamment rigide.
Step 2
Pin the body template to your wool scrap and cut around it. No need to add seam allowances, they are already included in the template.
Étape 2
Épingler le patron du corps sur le morceau de laine et découper tout autour. Nul besoin d'ajouter les valeurs de couture, elles sont incluses dans le patron.
Step 3
Repeat step 2 to have two identical pieces.
Étape 3
Répéter l'étape 2 pour obtenir deux morceaux identiques.
Step 4
Match both pieces wrong side out and pin in place.
Étape 4
Aligner les deux morceaux l'un sur l'autre, endroit contre endroit, et épingler en place.
Step 5
Sew all around your two pieces. No need to leave an opening, we will use an easier - and lazier - technique.
Étape 5
Coudre tout autour des deux morceaux. Pas besoin de laisser une ouverture, nous utiliserons plutôt une technique plus simple et plus rapide.
Step 6
Separate the two layers between your fingers by pinching one of them, and with the point of your scissors, make a vertical cut no longer than 1 1/2" long.
Étape 6
Séparer les deux épaisseurs entre les doigts en pinçant l'une d'elles, et avec la pointe des ciseaux, pratiquer une entaille verticale qui ne dépasse pas 4 cm de long.
Step 7
Through this opening, turn your owl inside out. The side that has the opening will be the front of your owl.
Étape 7
Par cette ouverture, retourner le hibou pour que l'endroit soit à l'extérieur. Le côté de l'entaille sera le devant du hibou.
Step 8
Now move on to the cardboard template. Place it on the wrong side of your scrap of cotton in a way that you have about 3/8" extra fabric on each side. Roughly draw a line around the template as I did in the picture below, and then cut on this line.
Étape 8
Utiliser maintenant le patron qui a été reporté sur du carton et le placer sur l'envers du morceau de coton, de façon à ce qu'il y ait un extra d'environ 1 cm tout autour. Tracer une ligne à main levée autour du patron, comme je l'ai fait dans la photo qui suit, et découper sur cette ligne.
Step 9
With your iron, or mini iron if you have one, fold the extra fabric over the cardboard template and press in place, then take the cardboard out.
Étape 9
Avec votre fer à repasser, ou mini fer si vous en avez un, replier le tissu sur le patron en carton et pressez en place. Retirer ensuite le morceau de carton.
Step 10
Place your piece of cotton, with the fold hidden inside, on the body piece, making sure to cover the cut from which you turned it inside out, and pin in place.
Étape 10
Placer le morceau de coton, avec le repli caché en dessous, sur le morceau du corps du hibou, en s'assurant de bien recouvrir l'entaille par laquelle le hibou avait été retourné. Épingler en place.
Step 11
With a needle and thread, blind-stitch the cotton piece in place.
Étape 11
Avec une aiguille et du fil, fixer au point invisible.
Step 12
Fold the upper point of the wool piece over the belly part, to form the head of the owl. Press in place with your iron.
Étape 12
Replier la partie supérieure en pointe par-dessus le plastron en coton, de manière à former la tête du hibou. Presser en place avec le fer à repasser.
Step 13
With embroidery thread, join the point to the belly. This will be the bill of the owl. Then, sew buttons in place for the eyes, and meet your new friend.
Étape 13
Au moyen de fil à broder, fixer la pointe au plastron, de manière à former un bec. Coudre ensuite les boutons en guise d'yeux, et il ne vous reste plus qu'à faire connaissance avec votre nouvel ami.
You can make as many owls as you want and have a whole family of them. To make a garland like I did in my top picture, simply thread a twine in the top fold of each owl and attach it to your wall.
Vous pouvez fabriquer autant de petits hiboux qu'il vous plaira et en avoir une famille complète! Pour en faire une guirlande comme j'ai fait dans ma photo du début, il vous suffira d'insérer une ficelle sous le pli au sommet de la tête de chaque hibou, et d'en attacher les extrémités à un mur.
Below is the template that I used to make my owls. I can't explain why it appears grey when my paper sheet was white, but it seems like this is the best I can do for now... You may want to save the image to your computer and then print it on letter-size paper. The dimensions are there so you can check that your printed template is the same size as mine. Of course, you can enlarge it if you want, but then the quantity of fabric needed will be greater than what I gave in the material list.
Voici le patron que j'ai utilisé pour fabriquer mes hiboux. Je ne m'explique pas comment l'image peut apparaître grise alors que ma feuille de papier était blanche, mais il semble que ce soit le mieux que je puisse faire pour le moment... Il serait sans doute préférable de sauvegarder l'image sur votre ordinateur avant de l'imprimer sur du papier de format lettre. Les mesures sont indiquées pour que vous puissiez vérifier que votre patron une fois imprimé a les mêmes dimensions que le mien. Bien sûr, rien ne vous empêche de l'agrandir si vous le voulez, mais dans ce cas rappelez-vous que vous aurez besoin de plus de tissu que ce que j'ai noté dans la liste de matériel.
Have fun making owls and don't forget to show them to me in the comments!
Amusez-vous bien à fabriquer des petits hiboux, et n'oubliez pas de me les montrer dans les commentaires!


Trop cute ces hiboux! Beau tutoriel, bien expliqué. Vraiment une belle idée.
ReplyDeleteLove the eyes on them
ReplyDeleteI was immediately attracted to your owls because they are great birds. I am going to enlarge the pattern, then add another piece of fabric to make a simple purse, make a fabric handle and voila!
ReplyDeleteI love owls so I would like to make these as a wall feature in my grandson's nursery. Thank you for this simple and easy pattern.
ReplyDelete